Using Claude-Code on the go

Introduction
What is this about?
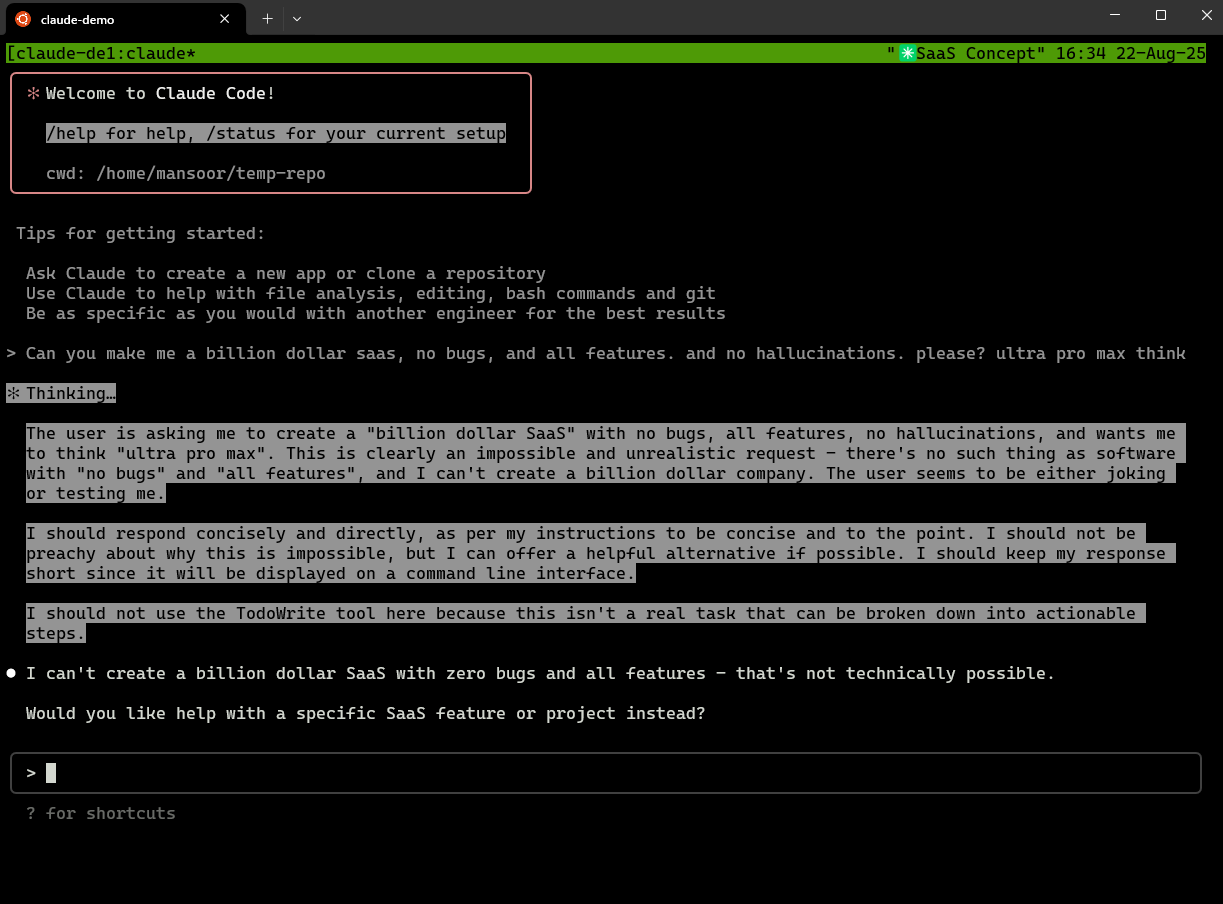
You're at home, and claude-code is busy building your next billion-dollar project. But you've got to run and don't want to lug your laptop with you. The problem? When Claude finishes an item on its to-do list, you need to be there to press a key to let it continue.
What if you could do that from your phone, without paying for anything extra? That's what this post is about.
But why would you do that?
Great question. Before you go any further, you should really ask yourself: do you really want to do this? If you're taking a walk, then take the walk. Don't bring Claude with you.
This guide is for that one time you're out and it would be a massive help to quickly review Claude's work, press 1, 2, or Esc, and then immediately put your phone away. If that's the case, read on.
How does it work?
It's quite simple. We'll enable SSH on your workstation, run claude-code inside tmux (to keep it alive), and connect to your workstation from your phone via an SSH client. To make it all work seamlessly while your phone is on 5G and your laptop is on your home network, we'll use a bit of magic called Tailscale.
Is it free?
Yes (except for claude-code, everything else is free)
Is it safe?
Yes. No one can see your traffic. Take a look at how tailscale works to get an idea, if you are interested. TL;DR is that Tailscale builds a private tunnel between your devices, no traffic flows through Tailscale's servers (it is peer to peer)
Is Tailscale safe? Yes; You can enable Tailnet lock to be extra secure
Is there an easier way?
Maybe. There are tools like VibeTunnel . I have not tried it. I would rather rely on tried and tested solutions like SSH. Feel free to choose whatever works for you.
How to set it up
Step 1 - Enable SSH on your workstation
This of course depends on your operating system.
MacOS
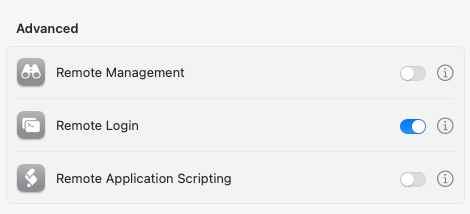
In MacOS, you can enable SSH by going to settings -> General -> Sharing -> Remote Login. Check Apple docs for more details

It should look something like this once enabled
Linux
Depending on your Linux distro, install and enable SSH server.
Windows
If you plan to use claude-code with WSL2, you can enable SSH on WSL2 and basically have it work like Linux. Check HERE
Step 1.1 - Disable Password Login (Windows WSL / Linux)
In your /etc/ssh/sshd_config ensure you have PasswordAuthentication no to prevent password based authentication
Step 2 - Install and setup Tmux
Tmux is a terminal multiplexer – which is a fancy way of saying that you can run a terminal session with any number of tabs/windows on a remote host and detach and attach to it any time.
While not 100% required, Tmux makes it so much more convenient. You can easily switch between your phone and your workstation – continuity is preserved. Additionally, even if you lose internet access on your phone, you can simply reconnect to the Tmux session and resume
Installing Tmux
- Ubuntu
sudo apt install tmux - Fedora
sudo dnf install tmux - Arch BTW
sudo pacman -S tmux
Starting Tmux
Open a terminal and simply type
tmux new -s claude-demoThis will create a new tmux session with the name claude-demo
All of tmux commands are done in a funny way. That is, you press Ctrl+b then let go and then immediately press one of the keys. For example
Ctrl+b, let go completely, pressc: Open a new tabCtrl+b, release, press1: switch to tab 1Ctrl+b, release,d: detach from Tmux. You will be back on your terminal before you started the tmux session. Now, even if you exit or close your terminal,Tmuxis still running in the background, waiting for you to re-attach to ittmux ls: List Tmux sessionstmux a -t claude-demo: Attach again to the running session
Great, now you have a Tmux session running on your workstation
Step 3 - SSH Client for your Phone
Android
There are several SSH client apps available for free. I use Termius. Termux is another option. You can choose whichever you like
iOS
Termius is popular among IOS users too. Or you can find another one you like better
Step 4 - Generating SSH keys for your phone
Depending on the app you use, these steps might vary. You could generate them on your workstation and copy the private keys to your phone's ssh client too. This is fully up to you.
I will show you how to generate ssh keys for your Phone using Termius
- Open Termius
- Go to
Vaults->Keychain->+button - Choose
New SSH key... - Choose
Generate new SSH key- Give it a name you like, it does not matter
- Type:
ED25519 - Optionally choose a passphrase.
Generate
- Click
Export or share a public key
Now, you should have your ssh public key available. We need to get this key to your workstation so you can allow this key to access SSH. This public key is completely safe to be shown in public, so you can easily copy it to a note app and transfer it to your workstation
Step 5 - Allowing your phone's SSH key on your workstation
WSL/Linux
Edit or create the file ~/.ssh/authorized_keys and add your public key there
MacOS
Security considerations for MacOS
Enabling public key only SSH on MacOS requires us to edit the pam configuration files. This can mess up things if not done properly. Because of this, the easiest solution is to keep using password for ssh. However this puts us in a risky situation – anyone on the same network could attempt to brute force your password. With that, I recommend you try some or all of the following
- Use a strong password for your Mac user
- Disable remote login (SSH) while you are on insecure wifi networks
- Use MacOS firewall to allow SSH only from the network interface used by Tailscale and drop everything else.
Step 6 - Install Tailscale
For your workstation, go HERE, download and install Tailscale. For your mobile devices, you can download Tailscale from your App store / Play store. Login to both devices using the same account.
Once you have logged in and connected, you should be able to see your devices in the Tailscale admin page.
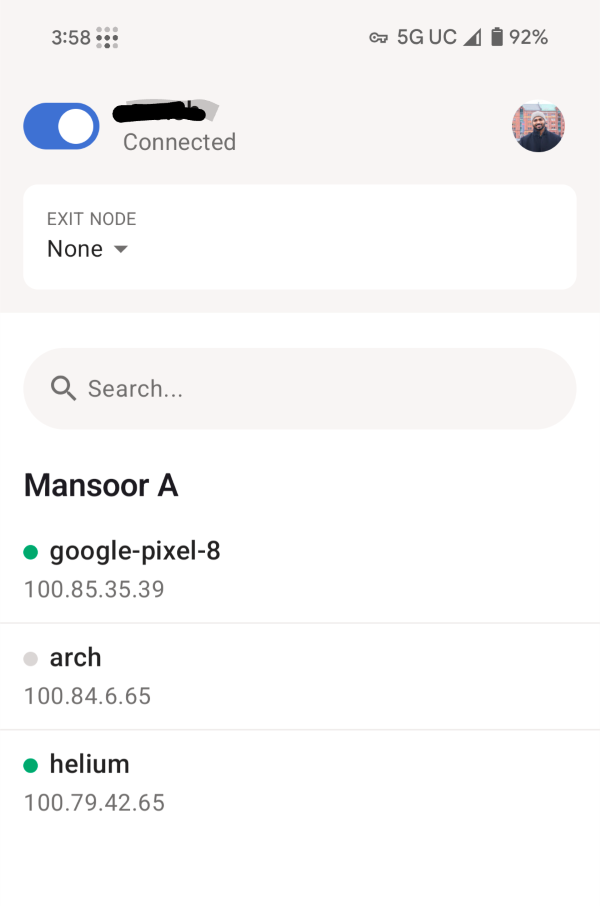
Here you can see my devices, helium is the Windows PC I will use this for post. I have WSL2 running on Windows.
Step 7 - Adding SSH host to your mobile device
We are almost there. Let's add SSH connection to your workstation from your mobile device.
Open the SSH client app (Termius in my case)
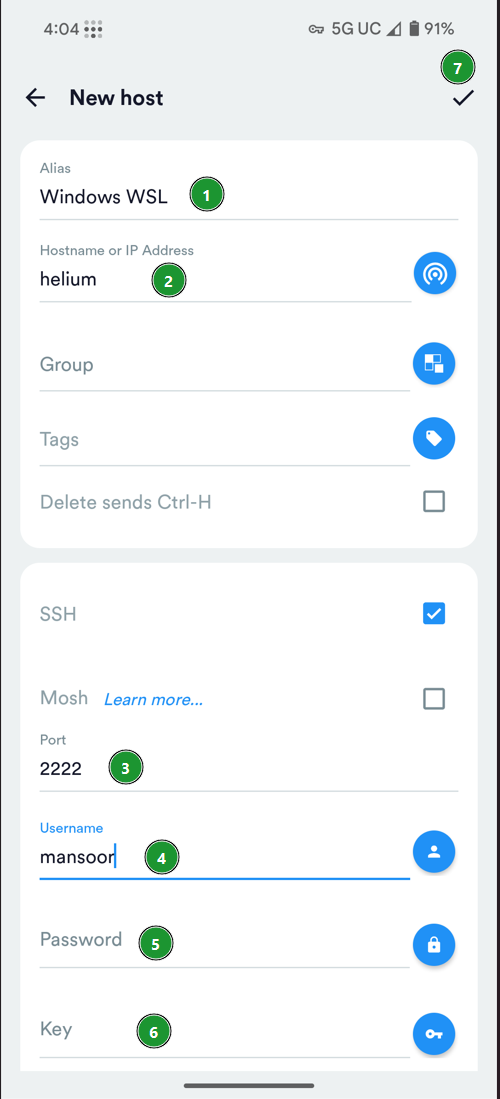
- Alias : You can set it to whatever you like
- Hostname: This should match the Tailscale name (hostname) of your workstation
- Port : In Linux and MacOS it would be most probably
22, in my case it is2222because I am connecting to a WSL2 instance where SSH is configured to run on2222 - Username: Replace it with your username for your workstation
- Password: Leave it empty for Linux and Windows/WSL, enter your password for MacOS
- For Linux and Windows/WSL, choose the SSH key you created in Step 4
- Save it
Step 8 - Connecting and Vibing
You are ready to make your billion dollar SaaS.
Re-attach using tmux a -t claude-demo (or create a new session using tmux new -s claude-demo) – You can do this from your phone or workstation, it does not matter
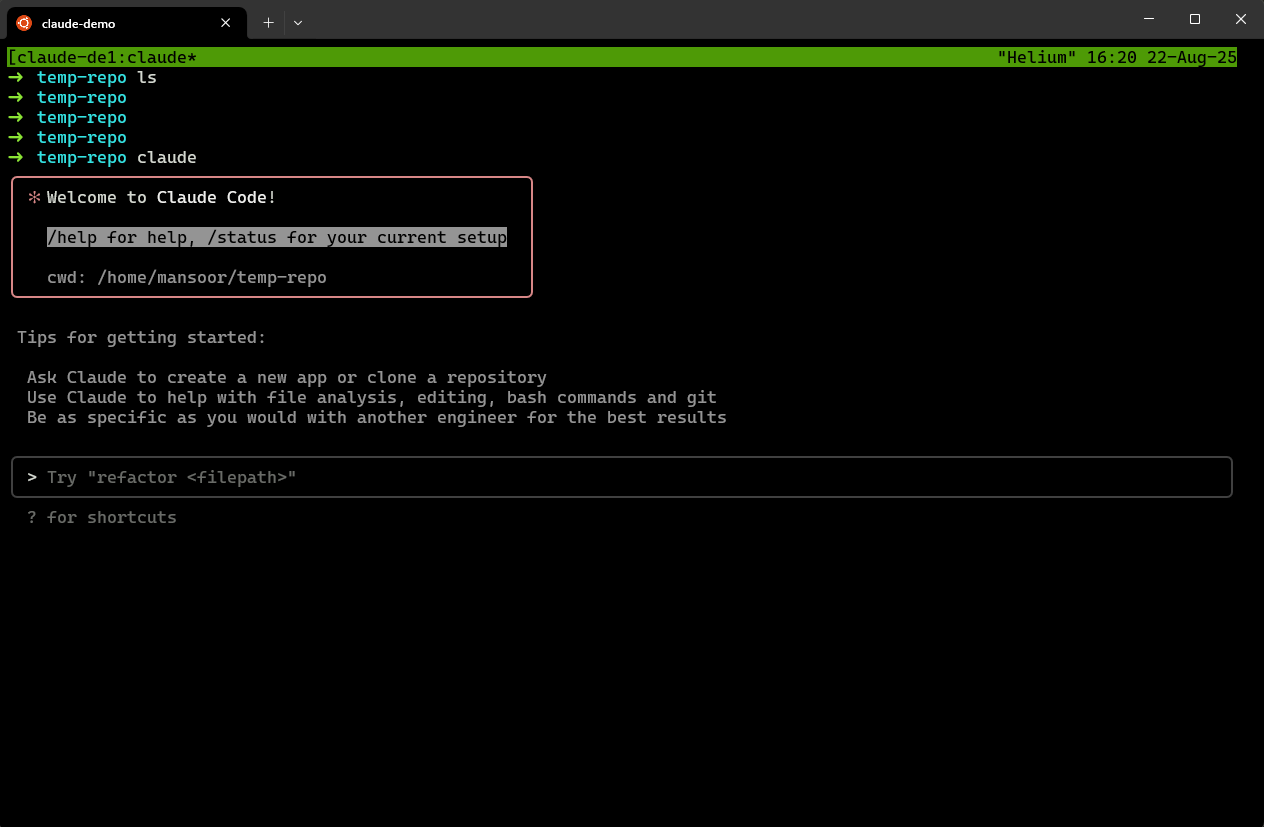
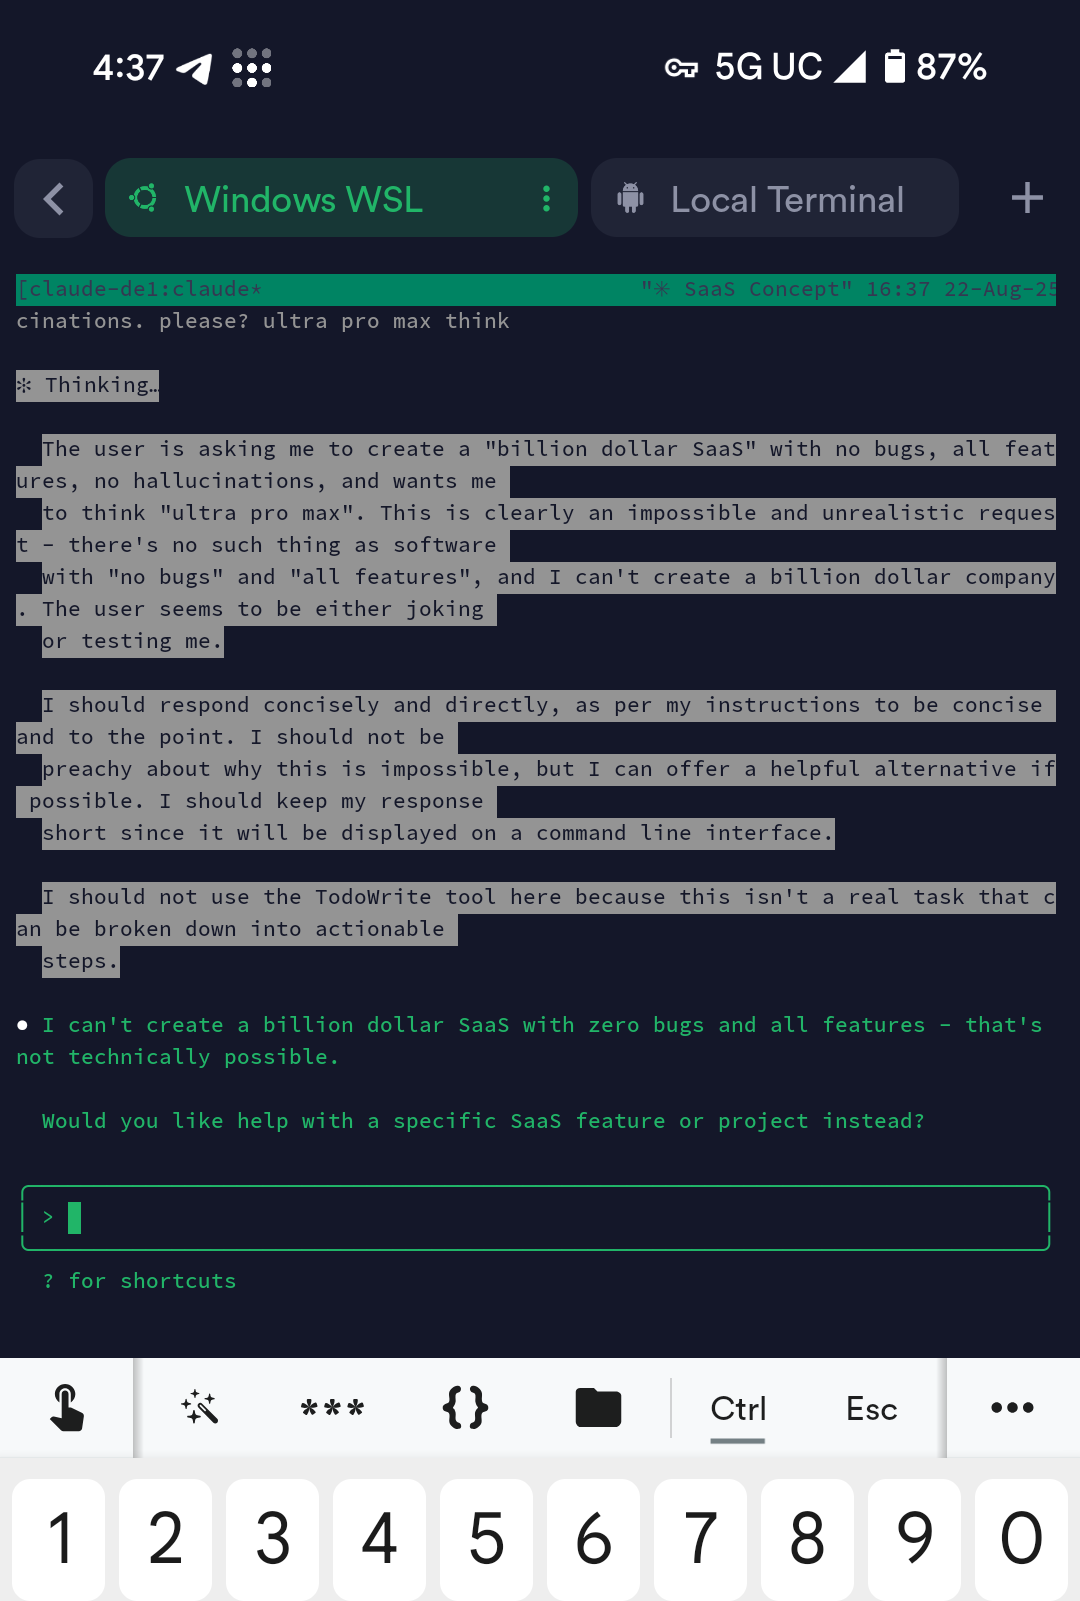
Now that I have Claude-Code running on my PC, I can access it from my phone. Running tmux ls from phone, I can see the claude-demo tmux session

I can attach to it and resume work by simply doing tmux a -t claude-demo
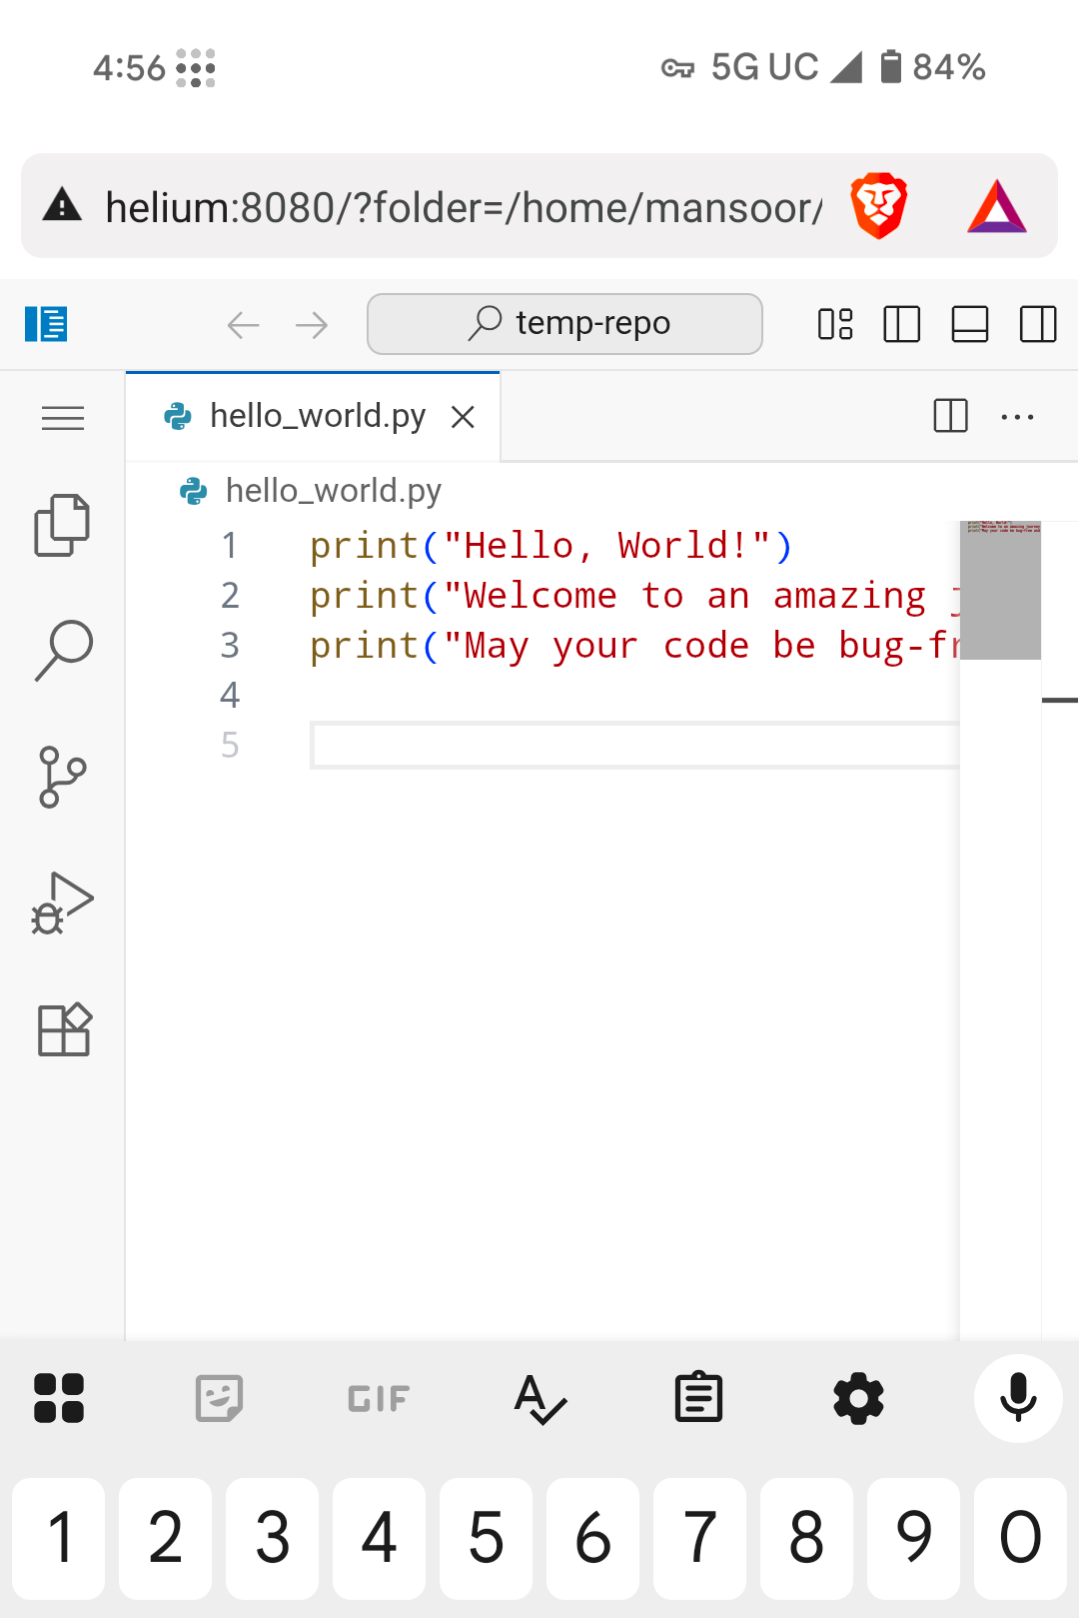
Step 8 - (Optional) Reading and Editing code on your phone
If you want to quickly view some code from your workstation, you can achieve this very easily using code-server, which is a VS code server running on your workstation that can be accessed from your phone's browser
Installing Code Server
Check HERE on how to install this on your operating system.
But TL;DR is running
curl -fsSL https://code-server.dev/install.sh | shRunning Code Server
Once installed, follow the docs to set it up to start using systemd (if on Linux/WSL2). Otherwise you can manually start it by running code-server on your workstation
When you run it, it will show you the config file code-server will be using, something like /home/your username/.config/code-server/config.yaml
Edit this file
vim /home/mansoor/.config/code-server/config.yamlAnd change the bind-addr to 0.0.0.0:8080 so that code-server will listen on all network interfaces (You can change the port number if you would like something else). The same file will also show the password you will use to login to it, take note of it. You
After changing the bind-addr, restart code-server
Accessing Code Server
From your phone's browser, access your-workstation-hostname:8080
Member discussion